
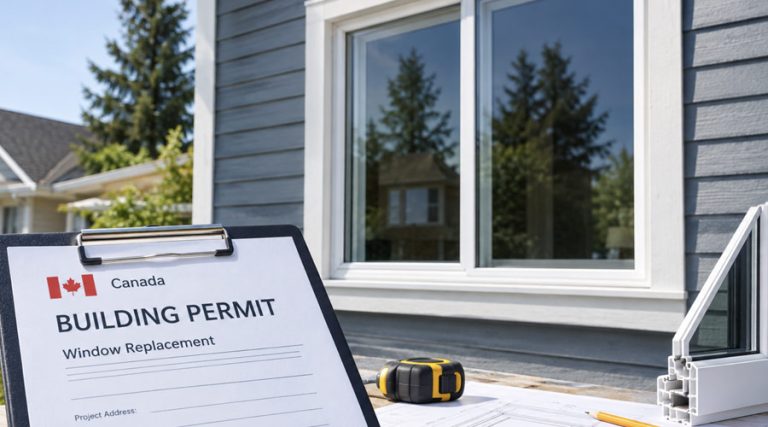
Window Replacement Permit: When You May Need One in Canada
A window replacement permit may be required when the opening, structure, use, appearance or building type changes. Learn what to verify locally before ordering windows or starting work.

Home » Doors Tips » How to Paint Exterior Doors Properly: A Step-by-Step Technical Guide
Painting an exterior door is one of the most effective ways to refresh a home’s curb appeal, but it requires an entirely different engineering approach than painting interior surfaces. Exterior entryways face relentless environmental stressors: intense summer UV radiation, wind-driven rain, high humidity, fluctuating dust, and harsh winter freeze-thaw cycles. Because of this, the coating must act as an active barrier protecting the substrate, not just a cosmetic layer.
For Canadian homes, proper surface preparation and material compatibility matter even more. Extreme temperature swings cause wood, steel, and fiberglass substrates to expand and contract at different rates. Without the correct primer, sanding profile, and paint chemistry, these movements quickly lead to cracking, bubbling, and peeling.
This technical guide explains how to properly paint exterior doors, select the correct products for different door materials, and avoid common application mistakes that compromise finish longevity.
So the real question is not only:
“Can I paint my exterior door?”
The better question is:
“How do I prepare the surface, choose the right paint, and avoid drying conditions that cause peeling, bubbling, or uneven coverage?”
Before initiating any surface preparation, you must decide whether to unhinge the door slab or paint it while it remains installed. While painting on-site is convenient for quick cosmetic touch-ups, a professional-grade finish almost always starts by removing the door.
Painting On-Site: Keeping the door installed eliminates heavy lifting and allows continued home access, but it introduces significant workflow compromises. Paint drips easily on vertical surfaces, perimeter edges become difficult to coat evenly, and restricted airflow around the weatherstripping can negatively impact curing times.
Removing the Door: Unhinging the slab allows you to lay it flat on a work table or sawhorse. This completely eliminates running drips, ensures uniform paint distribution across all four edges, and lets you work comfortably in a temperature-controlled garage or workshop.
Preparation dictates 80% of a paint job’s lifespan. Even the highest-grade exterior coating will fail prematurely if applied over microscopic layers of road salt, oils, or loose old finish.
Thorough Cleaning & Degreasing: Wash the entire surface using a TSP (Trisodium Phosphate) substitute or mild detergent to strip away accumulated grime, airborne pollutants, and hand oils. Rinse thoroughly with clean water and let the slab dry completely.
Mechanical Sanding (Etching the Surface): Lightly scuff the existing finish with 220-grit sandpaper (or a fine sanding sponge). The goal is not to strip the door down to bare material, but to create a microscopic “tooth” that mechanical bonds can latch onto.
Imperfection Repair: Fill dents, gouges, or deep scratches with an exterior-grade wood filler or auto-body filler (for metal/fiberglass), then sand smooth once cured.
Priming Bare Substrates: Apply a specialized bonding primer anywhere bare metal, raw wood, or exposed composite material is visible. Note: If you are prepping fiberglass entry doors, specialized bonding primers are essential to ensure the topcoat doesn’t peel under thermal expansion.
Preparation Takeaway: Surface prep dictates 80% of a paint job’s lifespan. Skipping degreasing or failing to scuff-sand glossy factory finishes will cause even premium exterior paints to delaminate within a single season of Canadian temperature swings.
Selecting the correct coating requires matching the paint chemistry to the physical characteristics of the substrate. Because exterior entryways constantly expand, contract, and face severe environmental exposure, rigid interior paints or cheap multi-purpose formulations will inevitably crack or peel. For most residential applications, high-grade exterior acrylic latex or specialized urethane-alkyd enamels provide the ideal balance of elasticity, adhesion, and weather resistance.
| Door Material | Recommended Paint | Important Notes |
|---|---|---|
| Fiberglass | Exterior acrylic latex | Avoid aggressive sanding |
| Steel | Rust-resistant exterior paint | Repair rust before painting |
| Wood | Exterior latex or enamel paint | Protect against moisture penetration |
Beyond chemical composition, selecting the right sheen level impacts both long-term durability and the visual staging of the entryway:
High-Gloss Finishes: Deliver maximum moisture resistance and are exceptionally easy to scrub clean of dirt, road salt, and fingerprints. However, high-gloss sheens act like a mirror, mercilessly highlighting minor surface imperfections, dents, or brush marks.
Semi-Gloss and Satin Finishes: The preferred choice for most residential exterior doors. They offer a refined balance, providing enough resin density to resist weathering and frequent cleaning while softly diffusing light to naturally mask minor substrate blemishes.
Choosing a paint color is not purely an aesthetic decision; it directly influences the thermal stress on the door slab:
Dark Colors and Solar Heat Gain: Deep hues (such as dark charcoal, navy, or black) absorb significant solar radiation. On a south- or west-facing Canadian entryway, dark metal and fiberglass doors can reach very high surface temperatures in summer, causing rapid thermal expansion followed by stress cracking or warping as temperatures drop at night.
Lighter Tones and LRV (Light Reflectance Value): Lighter shades reflect sunlight efficiently, maintaining lower structural temperatures and significantly extending the lifespan of both the paint film and the underlying substrate. If using a dark color on an exposed exterior door, ensure the formulation contains high-performance UV-resistant resins designed to mitigate thermal shock.
Compare local door companies, installation options, and replacement services before choosing a contractor.
Once the door slab is clean, fully cured from any primer touch-ups, and resting horizontally on sawhorses, the actual painting process requires patience and disciplined technique. Rushing through heavy coats leads directly to sagging, runs, and uneven curing.
Weather conditions directly dictate how paint dries, coalesces, and cures. Environmental factors such as ambient temperature, relative humidity, and solar radiation control the rate at which solvents evaporate from the coating film. Most exterior paints perform best when temperatures remain moderate, and humidity stays relatively low.
| Condition | Recommended? | Why |
|---|---|---|
| Mild temperatures | Yes | Allows proper drying and adhesion |
| Direct hot sun | No | Paint may dry too quickly |
| Rain or high humidity | No | Can affect curing and finish quality |
| Freezing temperatures | No | Paint may fail to cure properly |
Important: In Canada, late spring and early fall are often the safest times for exterior painting projects because temperatures remain more stable.
Many paint failures do not manifest immediately upon completion; instead, they emerge weeks or months later after facing temperature shifts and moisture exposure. Avoiding these frequent pitfalls ensures long-term finish integrity:
Skipping Surface Cleaning: Failing to remove microscopic layers of road salt, airborne pollutants, or natural body oils prevents the primer and paint from forming a proper molecular bond, leading to early blistering and peeling.
Using Interior Paint Outdoors: Applying standard interior formulations means the coating lacks the necessary UV blockers and flexible resins required to handle thermal expansion and humidity, resulting in rapid chalking and cracking.
Painting Over Glossy Surfaces Without Sanding: Ignoring mechanical scuff-sanding leaves factory-smooth or old glossy finishes too slick for new coats to grip, causing the paint film to shear off under stress.
Applying Paint Too Heavily: Laying down thick, heavy coats in a single pass traps solvents beneath the surface skin, causing sagging, wrinkling, and soft spots that never cure properly.
Ignoring Environmental and Weather Limits: Painting outside recommended temperature or humidity ranges disrupts the essential coalescence phase, where paint particles fuse together to form a solid protective film.
Closing the Door Before Full Curing: Shutting or locking a freshly painted door prematurely can cause the soft paint film to fuse permanently against the weatherstripping, tearing the finish when reopened.
Compare local door companies, installation options, and replacement services before choosing a contractor.
A professionally prepped and properly coated exterior door typically maintains its protective barrier and aesthetic appeal for 5 to 10 years, though actual longevity varies based on material stability, paint grade, and localized environmental stress.
The Impact of Cardinal Orientation (Solar Exposure): South- and west-facing entryways bear the brunt of intense UV radiation and extreme thermal cycling. The constant heating and cooling accelerate resin breakdown, causing dark colors to fade faster and lighter coatings to chalk prematurely. Conversely, north- and east-facing doors experience far less thermal stress, often extending paint lifespans closer to the decade mark.
Coating Quality and Film Thickness: Premium exterior acrylic latex and urethane-alkyd formulations contain advanced UV-blocking additives and flexible resins that resist embrittlement. Applying correct, uniform film thicknesses ensures the coating expands and contracts alongside the substrate without fracturing.
Preventative Maintenance and Cleaning: Routine washing removes corrosive airborne pollutants, road salt (especially critical in Canadian winter regions), and abrasive grime that can slowly degrade the protective clear and pigment layers.
Waiting until the paint completely peels off exposes the raw substrate to moisture damage and rot. Watch for these early indicators that a maintenance coat is required:
Fading and Loss of Sheen: A dull, chalky surface texture indicates that UV rays have eroded the outer resin layer.
Hairline Micro-Cracking (Crazing): Fine spiderweb cracks across the surface mean the paint has lost its elasticity and can no longer accommodate substrate movement.
Flaking or Bubbling: Localized delamination around raised panels or bottom edges, usually signaling moisture intrusion from behind the film.
Homeowners maintaining painted entry systems may also find our related guide on tips to clean windows and doors helpful for preventing stubborn dirt buildup and premature finish wear.
Quick answers for homeowners repainting exterior doors in Canadian weather conditions.
Primer is usually recommended when bare material becomes exposed, when the old finish is damaged, or when switching between significantly different paint colors.
Yes. Fiberglass doors can usually be painted successfully when cleaned properly, lightly sanded, and coated with exterior-grade paint designed for outdoor use.
Semi-gloss and satin finishes are popular because they balance durability, appearance, and easier cleaning.
Drying time depends on the paint product and weather conditions, but many exterior paints need several hours before light use and significantly longer before fully curing.
Transforming an exterior door from a weather-beaten liability into a resilient architectural asset is ultimately an exercise in discipline rather than complexity. Because exterior entry systems face relentless seasonal abuse from Canadian freeze-thaw cycles and driving rain to intense summer UV radiation, shortcuts in the preparation or curing phases will inevitably result in premature failure.
By prioritizing meticulous cleaning, mechanical scuff-sanding, compatible priming, and disciplined multi-layer application, you establish a robust protective barrier that shields the substrate for years to come. Ultimately, approaching an exterior door project with an engineering mindset respecting material dynamics, environmental windows, and curing chemistry ensures a factory-smooth finish that not only elevates your home’s curb appeal but withstands the elements season after season.
A window replacement permit may be required when the opening, structure, use, appearance or building type changes. Learn what to verify locally before ordering windows or starting work.

A practical framework for generating qualified window and door leads, selecting channels, controlling response and attribution, and avoiding common compliance and quality failures.

A practical framework for moving qualified window and door opportunities through consistent stages, producing evidence-based forecasts and aligning sales activity with operational capacity.

A practical KPI framework for Canadian window and door companies, with controlled definitions, formulas, reporting rules and management actions.